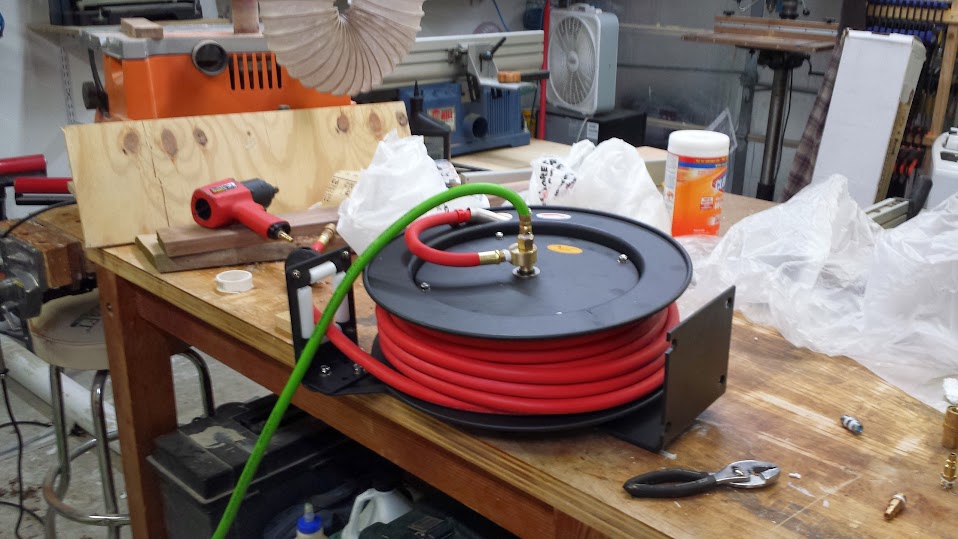
Well, Lorings install thread, me literally tripping all over my existing hoses when trying to run the hose out to the driveway, and a Harbor Freight coupon for the reel in question pushed my motivation to 100%, and I grabbed a reel for myself.
And yes, I admit it. I have been eyeballing one of these since I first thought about getting an air compressor. My experience when I was a much younger man working as a mechanic in shops that had these hose reels convinced me of the utility, and safety benefits of self retracting hose reels. I worked in one shop that was not so equipped and it was a miserable experience trying to work around my hoses...
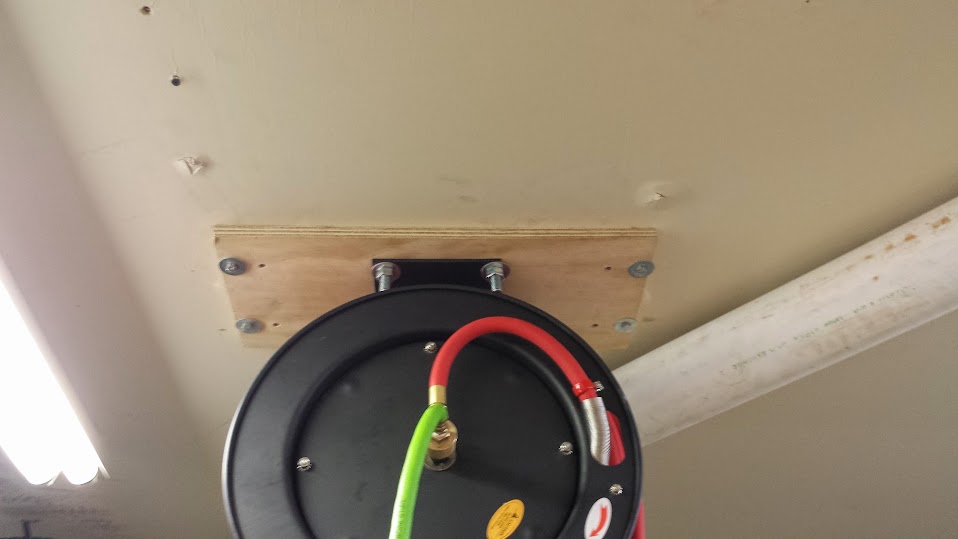
So the first thing I had to do was fab up a simple mount board. I centered the reel on the board, marked the location of the holes for the mounting bolts, measured off where the holes for the lag bolts to hold this up on the 16" OC studs that my house should have, and got to drilling. I countersunk the back side of the mounting bolt holes so that the heads for the carriage bolts don't sit proud of the mounting board.
For mounting hardware I used 1/2" x 2" nickel plated steel carriage bolts, plain washers and nuts. I left the washers and nuts on the bolts that the slotted holes would be in (the front of the reel in my case), and went to hanging the mount board.
I found the first stud, approximated the center, drilled my first pilot hole, and ran the first bolt, I squared up the mount board in relation to the walls, and drilled the pilot for and ran the second bolt, Then I drilled for the first of the bolts in where the second stud should be...
Problem.
It appears the truss members / studs whatever you want to call them, for my roof / ceilings are NOT 16" OC like I expected, but rather, 19" OC that I verified with a tape measure after cleanly missing the wood by a couple of inches.
So I had to transfer my measurements, and move the lag bolt holes closer to the ends, so that they are 19" between, and then remounted it all up...
So now I have a nice mount board, pulled up nice and flush against ceiling drywall that HAD been sagging off of the trusses. Yeah that needs to get fixed, but I digress... so the mount board is there, and nice and tight.
I was fearing from LCHIEN's description, having trouble getting this up there, but installation of the reel itself couldn't have been easier. It went thus...
#1. With the mount board installed, and the 2 front washers / nuts on but run almost to the falling off point, maybe 3 threads run in, I placed the other 2 nuts and washers on top of the ladder.
#2. After hauling the reel up the ladder, I grabbed the reel by the frame, not the spool part, and slid the slotted holes over the washers / nuts / bolts, then rotated it such that the full holes slid over the other 2 bolts.
#3. with my shoulder, I simply kept pressure on the front of the reel keeping it up against the board, keeping it on the bolts.
#4. I then put the outside washer and nut on so that I had 3 supports. I ran those 3 nuts in finger tight.
#5. I then added the 4th washer and nut, ran it finger tight.
#6. I then snugged all 4 mount bolts up tight with a combination wrench. No there is not enough space to get a ratchet / socket in there. The 2" carriage bolts barely clear. I probably should have used 1.5" but these will do.

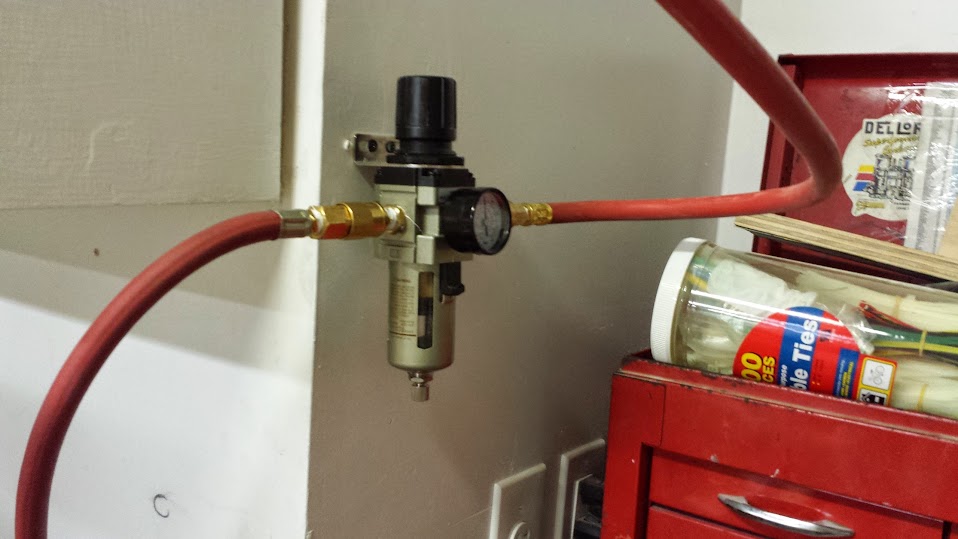
#7. Lastly, I changed out my plumbing. 50' blend hose is gone, in its place is the 8' rubber hose, connected via quick connectors, threads sealed off with plumbers tape. And only the 3' whip from the 29 gallon compressor is feeding the regulator / hose / hose reel. I have mentioned elsewhere. If you are tempted by the light weight of the PVC / Rubber blend hose, resist temptation. These things are JUNK!
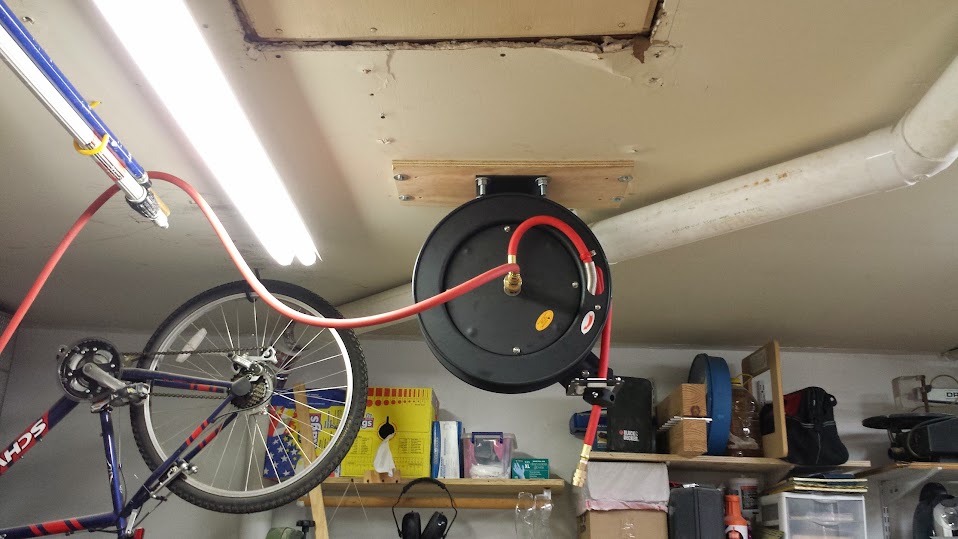
I just need to tidy up the feeder hose routing and it is finished,
until I decide to hard plumb it!
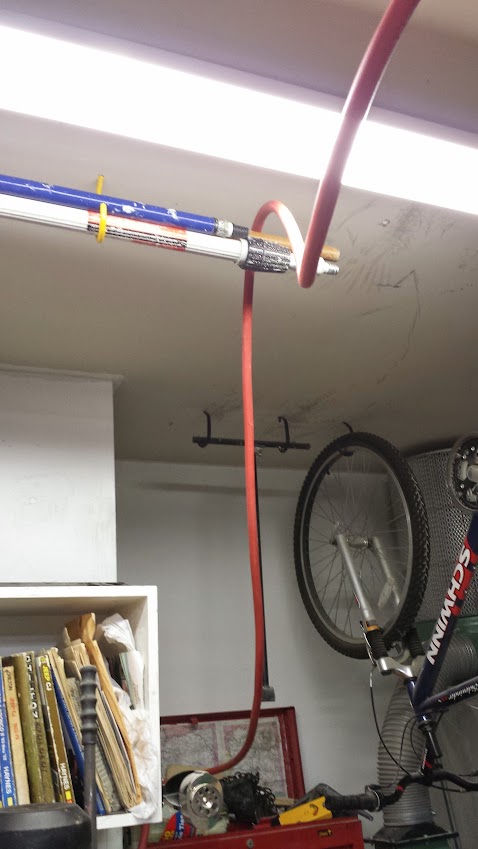
I have plenty of hose with that 8' hose, I need to make some final changes that include changing the mounting config of my shop light from direct ceiling mount to chain mount. Which means i need to find the chain for this... And I need to come up with some sort of clamps to secure the hose to the wall and ceiling.
While I had considered the keyhole slot approach, I found that I really didn't need to go to that much effort.
If you are considering adding one of these to help manage your air hose, and are concerned about one man installation, don't be, it was far easier than I had originally thought, the weight / ackwardness of the reel as it was being installed was really quite easily manageable even for someone with back problems.
I may have mentioned before the reason I was trying to gang the 2 compressors together in the first place, which is incredibly poor performance of my Harbor Freight "Earthquake" impact wrench. I may have also mentioned my attempt to fix that thinking the problem might be the gun itself. Let's face it, impact wrenches don't run all the time, just short bursts, the 8 gallon should have been able to handle it by itself... So I literally dropped in as much air tool oil as it would let me put in, and I let it soak, overnight. The next day I plugged the impact wrench in, and with a paper towel / rag just behind the exhaust port to catch the oil, I ran the impact wide open, it spit, choked and sputtered at first, spit out a piece of what I thought might have been white protective plastic... Well it occurred to me last night what that "plastic" might have been...
You see I kind of wondered due to the finish being off of the inlet threads if my particular gun was one somebody returned to the store... I bet I know what happened...
I bet they screwed up applying teflon tape to the threads, got a piece sucked into the inlet and jammed it up not allowing the gun to breathe...
I have yet to put it on a bolt, but I can say that before the junk blew out of it, I could easily hold the gun with a few fingers and pull the trigger with no reaction. Now when I pull the trigger the gun tries to torque itself out of my hands... I need to verify on a stubborn bolt, but I think I have the issues with the impact wrench sorted out.
I have heard from several folks telling me how I should be using hard line, at least 3/4" and a shorter reel. And while I appreciate their expertise in the area, for my application I don't see that happening, at least not right now. The 50' hose / reel stays put for sure, I got it for the express purpose of being long enough to not only sufficiently supply air power to my shop, but also be able to reach the far corners of my driveway for doing things like changing out struts on the car etc...
Admittedly this 50' hose is a different one from the ones I used previously, but thus far I have succesfully used with this comrpessor and 50+ feet of 3/8 hose...
3/8 pnuematic ratchet.
Air hammer.
air powered random orbital sander. Not mine, but I am going to buy one of them soon. I need to do some wet sanding and water + electric sanders is bad news...
Framing nailer
Finish nailer
Stapler
Pin nailer
HVLP gun
1/4" die grinder.
Siphon feed / conventional spray gun.
1/2" impact wrench tenative to like I said, getting this on a stubborn bolt.
Various blow guns.
There are a few tools I don't have that I want that are pneumatics.
Angle head air drill.
Air powered random orbit sander.
And if I can find one in good shape for dirt cheap money used. A paint shaker... I really can live without that though. Just keep using a mixing paddle on a drill rig and it works fine...
If my rig works the way I want it to, it might not be "right" by why fix what isn't broken right?
No comments:
Post a Comment