30 May, 2014

Sometimes threads just don't want to seal. Period... And colleague success with a recommended tool.

Again with the air system. I had previously been fighting multiple leak failures, and thought I had it solved with the PTFE paste thread sealant. However there was one joint, the male connection for the hose that connects the air filter / regulator to the hose reel, that simply, no matter what, kept after about 6 hours, would blow the pipe thread sealant out of the joint and leak like crazy.

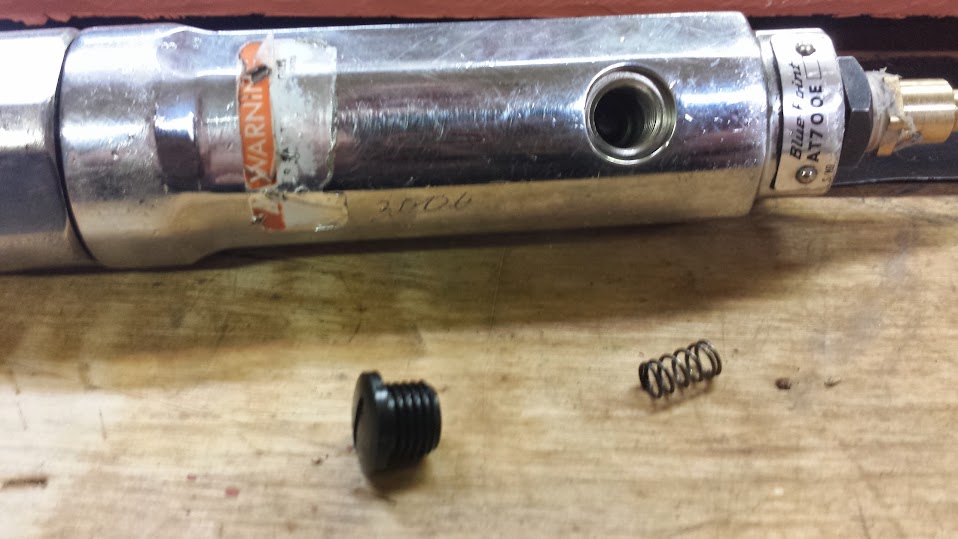
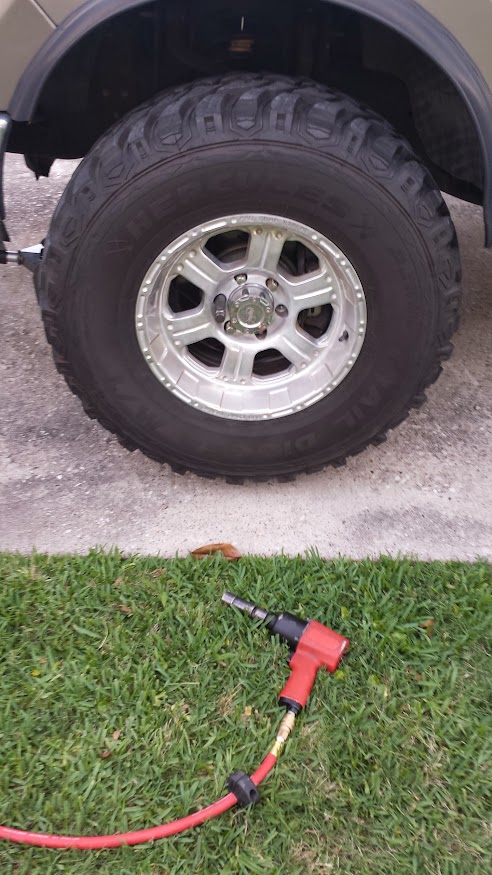
Last night, before I fixed the Blue Point air ratchet, I had finally had enough of the bleeding down this dumb joint caused, and opened one of my spare Harbor Freight I/M Quick Disconnect sets. If anyone is even vaguely interested, I am using Harbor Freight Item #68237 5 Piece Brass Industrial / Milton Quick Connect Starter Set. Sadly though, they only come with one female threaded male plug for hose end use...

So I carefully disassembled the original female thread, male quick connect fitting from the hose, and cleaned the male thread ends on the hose and the female thread ends on the fitting. Both appeared to be in good shape, nothing visibly malformed, but the recurrent leak is coming from this point, so something in the way these two mesh was causing it...

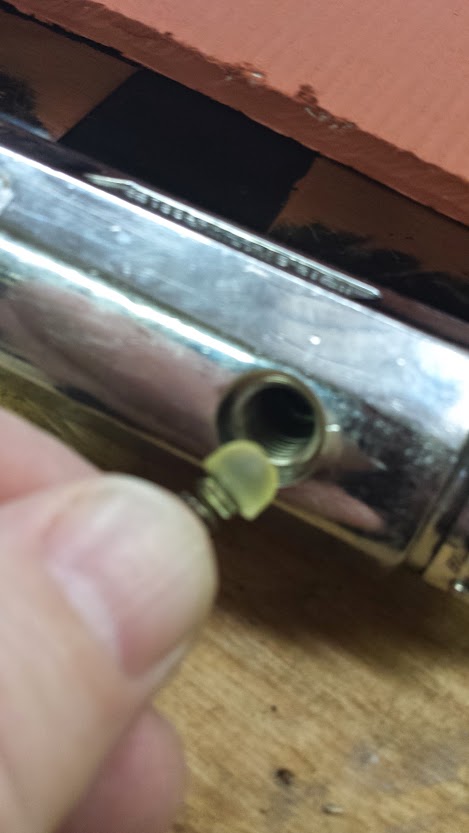
I carefully applied the PTFE pipe thread compound on the male threads, and proceeded to install the new fitting on to the existing male hose end. With my combination wrenches, I simply snugged the fitting down. Not super tight, but not so lose that it will work its way loose.


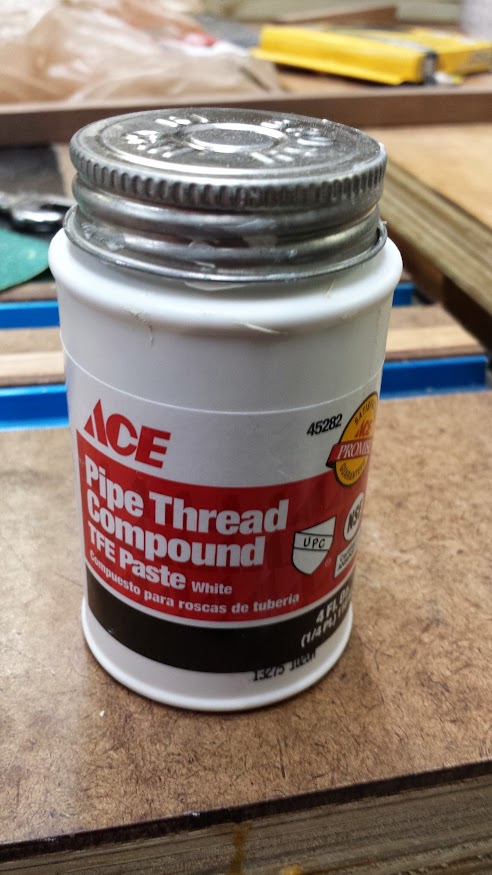
I should mention that I sourced my Pipe Thread Compound from my local Ace Hardware store. It needs to be mixed up after sitting for a while as it separates, but once mixed, it applies reasonably easily, and is easy to clean up the excess.

Once the hose end connector was installed, I cleaned up any excess pipe compound, reconnected the hose, and then pressurized the entire system...

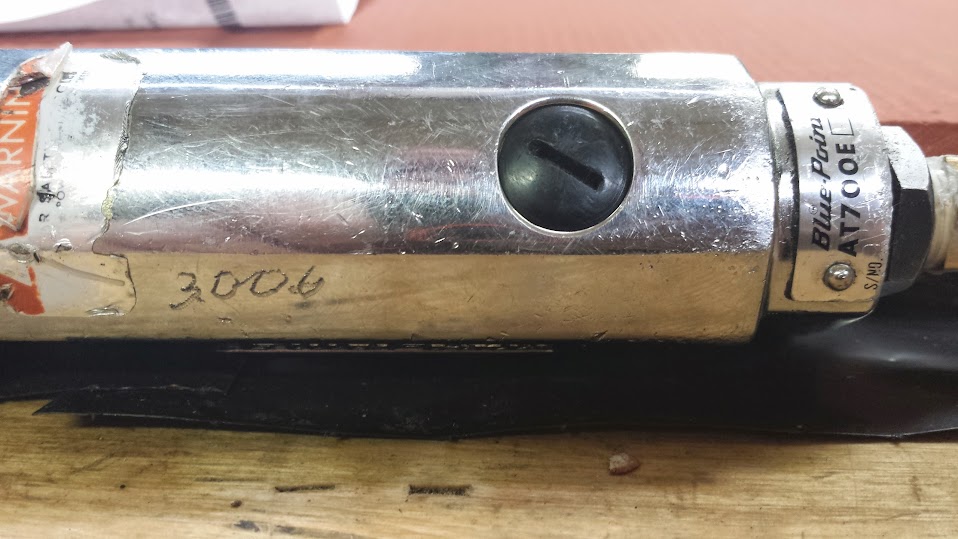
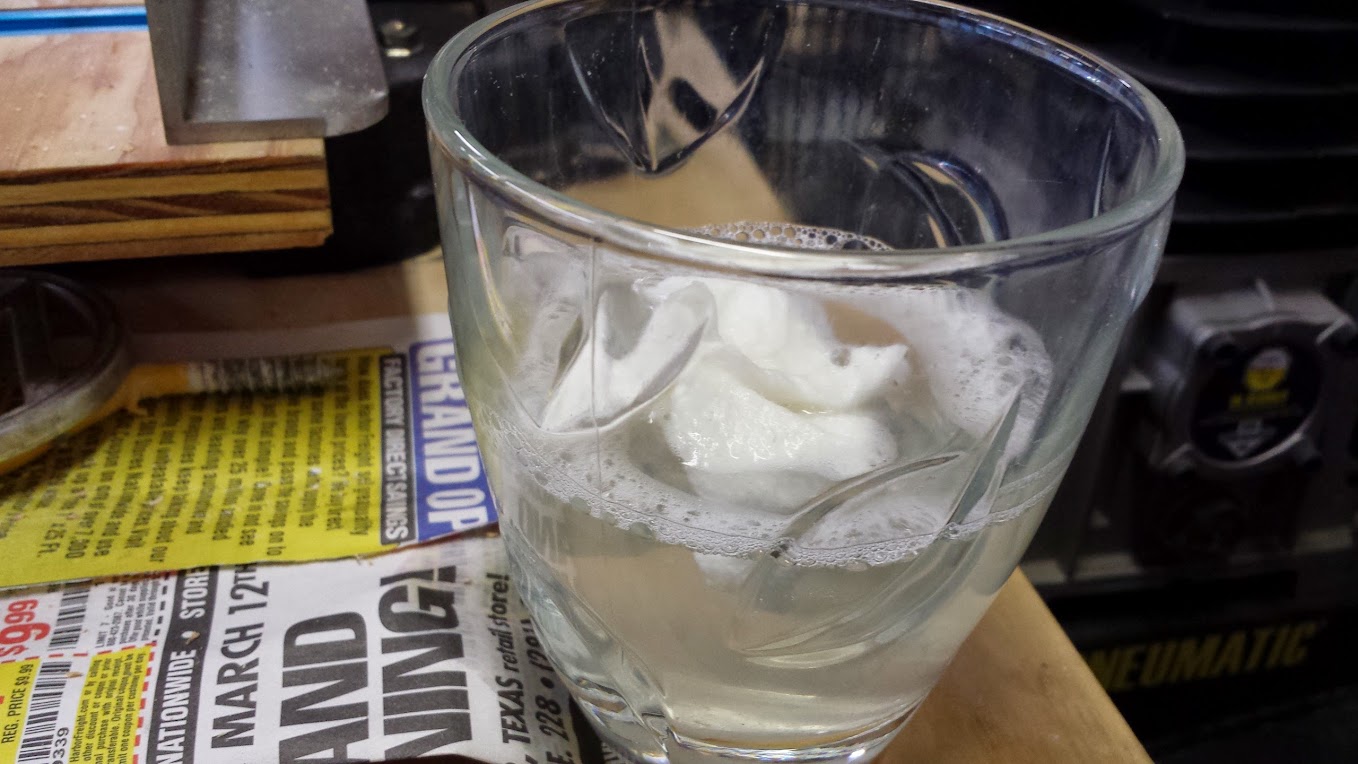
After this I figured I would give in an hour or so, which was about as long as it took for the old fitting to start the leaking. So I fixed the air ratchet, tested it out, did the work on the truck, and came back to test the air fitting. Soapy water test showed no leaks, on any of the joints, period.

Testing is very simple, just put some dish soap, and water in a glass, toss in a paper towel and mix it up getting the towel saturated. Squeeze out any excess that would run off, but leave the towel wet enough to transfer some of the solution when you get to the joint in question. They simply dab the solution where you want to test. (Sorry the pics of that process I tried to take I can't manage the camera AND applying the solution at the same time, maybe I can con my wife into shooting the pic for me?). Check for bubbles. And I don't mean bubbles just sitting there induced by the process of putting the solution on, but new bubbles. You will KNOW if you see them, they are REALLY obvious... In this case, there was no obvious leak.

At that time I put my tools to bed, powered off the compressor, but left the system pressurized, noted the pressures on the gauges, 150 psi tank pressure, 125 PSI from the compressor regulator to the filter, and 90 PSI at the regulator / filter, then finally closed up shop for the day.

This morning, 12 hours later, I went out and looked to find that the gauges hadn't moved a hair, pressures are still exactly where I left them yesterday, and the soapy water test still showed no leaks...

This evening, a full 13 hours after leaving for work this morning, I double checked the pressures. Somewhat foolishly AFTER testing out some air tools so the pressure in the tank dropped 10 psi... It DID read 10 over this reading...

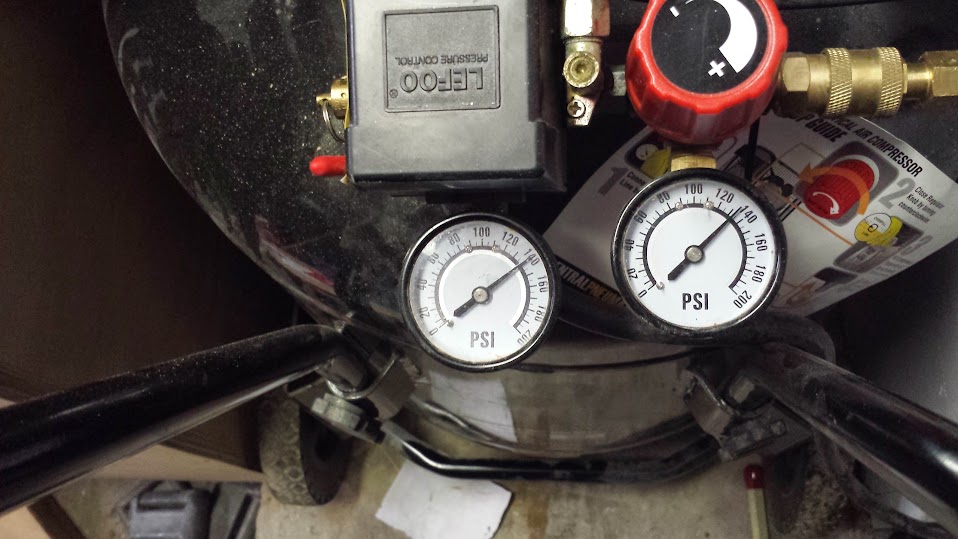
The 140 PSI tank reading was due to me running the air ratchet
before I thought to take this pic. It really was holding steady at 150.

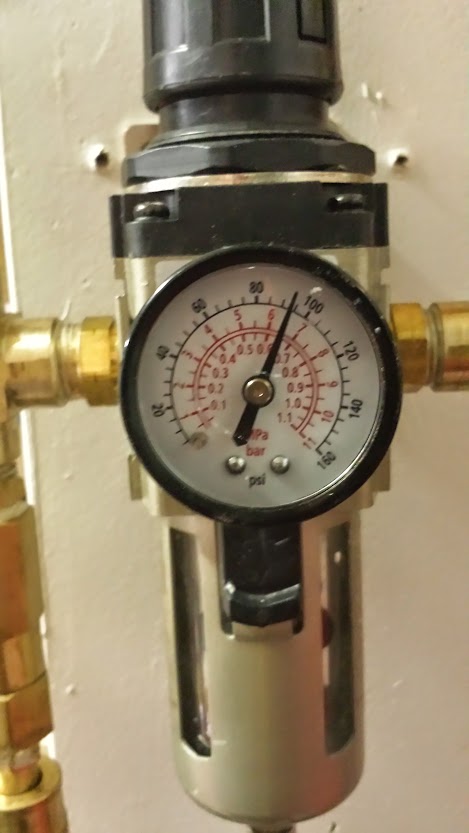
Regulated to keep my air tools happy.

What I find most irritating about this whole ordeal is the original fitting LOOKS good, and there are no immediate leaks in the system, but slowly, over a 6 hour time period it usually became a big leak.

Was there foreign debris in the pipe dope that was used with the old fitting? Highly doubtful. I clean my threads before connecting them, and the bottle of pipe dope was bought new, and ONLY ever used on this project. There has been very little opportunity for contamination.

Now the tool snobs, and Harbor Freight haters are going to instantly be thinking "you get what you pay for", and partially they are right, you get Marketing, TV and Radio ad time, and a very well compensated, bloated executive ranks with brand name companies. Branding costs big bucks. I have had similar failures with "Brand name" fittings and tools. Remember, it was a Snap On / Blue Point air ratchet that got me working on pnuematics last night in the first place! And in the Auto Repair tools world, there simply is no better tool brand than Snap On. And they KNOW it, and charge accordingly...

A note to my woodworking readers that may not know about Snap On Tools. Think greasy Festool and you get the idea...

I am now short 2 of these 1/4" FPT x I/M male quick connect plugs from my set of spares. I should re stock from Harbor Freight as soon as I can. Yeah I can use FxF couplers, but that would induce yet another joint that is a potential source for leaks...

I have one more phase of the build out to go through I would like to add a 3/8" Dessicant dryer with oil removal fitler to the compressed air system in order to insure that nothing other than clean, dry air makes it past all the filtration to spray guns. I manually lubricate my pnuematic lubricated tools anyway. So no problem there. I guess I could use an inline lubricator, but I don't want to contaminate my air hoses...   I checked and the flow direction is right, so I will need at least a 3/8" short nipple to make the connection between this and existing. Most likely I will use Harbor Freight Central Pnuematic item #68234 FRL coupler for a cleaner more solid install. I will also need to slide back the feeder hose for the reel to accomodate the extra distance this will take up.

The dessicant dryer / oil removal filter assembly
The 3/8" FRL (Filter / Regulator / Lubricator) coupler
The photo is wrong. The actual item has a mounting tab
that would be on the right side of the picture partially
overlapping the O ring that matches the left side of the 
photo. The connection looks simple enough.


It IS possible I may not go that route though, and try to find a good dessicant dryer / filter that works with 1/2" pipe thread and go with a full out 1/2" sweat copper system. And plenty of folks keep telling me to go with 1/2 or 3/4" plumbing for my pneumatic system, however I have a grand total of 2 drops, and will only ever run ONE tool at a time, and in my experience working as a mechanic when I was younger, the shops were all plumbed with 1/2" cast iron. However a hard line plumbing system would greatly improve durability, but the only hose I am truly worried about is the one in the reel. I don't suspect it will live more than about 3 or 4 years before I have to replace it with a new one.  However several reviewers say they are getting 7 to 8 years out of a hose... I might get lucky. But I won't plan on it! I could reduce 1/2" pipe to 3/8" and keep the hardware that works. 3/8" iron pipe is impossible to find in Houston.

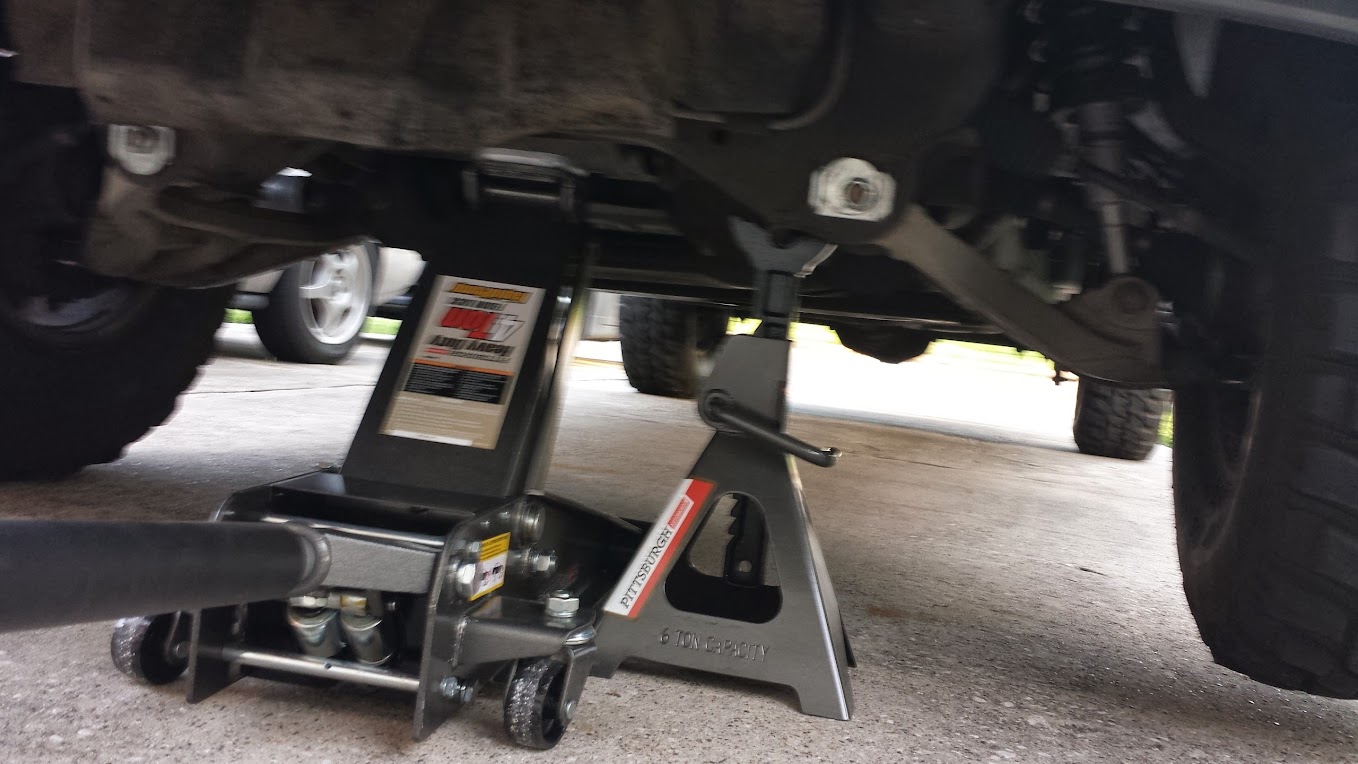
A recommended tool is working great for a colleague of mine that is a big car nut had asked for input on impact wrenches a while back, and I pointed him to the Central Pnuematic Earthquake 1/2" drive impact. He has a DeWalt 15 gallon air compressor, and is finding that it is sufficient to drive the gun And that has made his maintenance on his wife's Dodge Caravan easy as pie... (He had a strut job to do). Mind you. I did the decent thing and offered to loan him mine, but he wanted to buy his own...

So there you go. More success with the HF Earthquake impact wrenches... So far so good!

29 May, 2014

20+ year old Blue Point air ratchet repair.

For what it's worth, I may have mentioned previously that I had picked up a Central Pnuematic Professional 3/8" air ratchet because my old Blue Point ratchet died... I went ahead and ordered the repair parts when I had Snap On support on the phone getting a replacement for a busted deep well flank drive socket while I was on the phone I ordered the one part that went funky on it...

I did some Googleing to find the cause of an air ratchet that won't shut off and has no resistance to the trigger.  From my research including looking at the parts diagram there is a rubber "valve" stopper on the end of a spring between the pushrod and the screw on black plastic cap. Sure enough when I opened it up the stopper was crumbling and had failed.

I got the replacement and installed it last night.
.
The new piece is no longer rubber, but appears to be clear urethane,

The clear urethane valve replaces the rubber part. It should hold up longer
than the old rubber part.

Use a flat screw driver and turn the black plastic cap counter clockwise.
Once free CAREFULLY remove the cap insuring nothing falls free from the cavity.

I foolishly forgot to snap a pic of the crumbled rubber piece.
I cleaned it outand cleaned the cavity. You should have the cap
and spring out, the rest of the parts should stay internal.

Assemble the new "Valve" urethane piece onto 
the spring and insert valve first into the bore.

Reassemble the cap and tighten  CAREFULLY
so as to not crack the cap or bind the spring.

Once installed, I fired up the compressor and tested it out. It did not disappoint. I had to remove the winch from the truck, to move the license plate out from behind it, to a relocation bracket that goes in front of the roller fairlead. Using the air ratchet made quick work of the job, good thing too. It's been raining, a lot around here lately, and it is HUMID and HOT right now... Speeding this miserable job up was a God send for sure!

So if you are like me, and have old pnuematic tools that have failed, please do yourself a favor, and try to find troubleshooting information and repair parts for them... I REALLY didn't want to replace this ratchet, and honestly, it is kind of nice having 2... Now I can have different sockets on each and swap between quickly!

Another thing to mention is pnuematic tool seals dry out over time. Periodically crank up that compressor, oil the tool and run it a couple of cycles. Drive some brads, nails, run some bolts etc... Just put them to use or they WILL go bad...

Air Raid M.I.T. cold air intake tube 2004 F150 5.4L 3V V8

Okay this is a review sort of, and an answer to multiple requests. Folks have expressed an interest in this on several of the forums I am involved in, so I figure I would put up a post here about it...

The AirRAID 400-940 M.I.T. (Modular Intake Tube) is a direct fit replacement for the restrictive stock intake tube and silencer assembly with a smooth flowing, clean fitting intake tube  that feeds air directly into the OEM filter box. All sensors and other critical intake components stay in their stock locations. Rumors of early models of this tube causing early 5.4 3V engines to run lean have been reported, but honestly that makes no sense. The computer should autoatically adjust for any / all extra air coming in past the sensors.  I have noted no problems whatsoever with mine.

I am a little old school on this and run a K&N filter, yeah I know the oil from the K&N can, and indeed has fouled the MAF, it is easy to clean and everything beyond it is fine...

Since installing the tube, I have only had city miles on my truck, but in that time, I have noticed approximately a 2 mpg mileage gain from 10 to 12 mpg city. I know that sounds awful, but considering I am driving a lifted 4x4 truck with 35" rubber a winch etc... that is actually quite good. As long as I keep my foot out of it, I expect highway mileage to improve similiarly.

There was a notable, but not obnoxious change in engine sound with this tube. The truck now actually SOUNDS like a V8. In particular under hard acceleration, it sounds like a 4 barrel carburetor equipped V8, a much nicer tone than the overly quiet whoosh it used to have. Not obnixiously loud though.

Throttle response seems to be a bit improved, but again, this is a big truck, not a dragster...

And lastly, the looks, it just LOOKS better than stock, by a LONG shot... I never liked that oversized behemoth of an intake arrangement that was used from the factory.

I took the following photos the night I installed it. Sorry, I don't have any of the engine bay cleaned up and can't get any for a few days. My truck is in the body shop right now... You may want to boomkark this page though, I will try to post updated photos once I get my truck back from the body shop.

The Air RAID 400-940 installed on my 2004 5.4L 3V
The kit comes complete with a C.A.R.B. exemption 
sticker for those unfortunates that have to put up
with that.

Overall I feel this was a good purchase, however I would HIGHLY recommend you pair it up with a quality high flow air filter, AND a tuner... 

25 May, 2014

Investigating my options. I may have to move my shop...

First things first, I want EVERYONE reading this to understand this is not a complaint, in many ways this is actually preferable to the attached garage situation. So if I can beg your indulgence, let me lay it out here.

Without going into too much detail, we have an extended family member living with us that is on permanent disability. Long story, but this family member WAS married, and his wife decided when he got sick to bail out on him... She still has his stuff, and we need to put it someplace...

Combine that with the fact that our Saturn is getting OLD, and honestly, we want to eventually replace it with a car that would be worth keeping in a garage.

With that said, and with an offer from within the family to help fund a shed, assuming the HOA is agreeable to a variance from my C&R to get the size shed I need, I am giving serious consideration to what I will need to do in order to lay out my shop in a 12x16 shed.

I am giving serious consideration to an Alpine Portable Buildings 12x16x13 Gambrel Roof building with 6' sidwalls. The size is just about right, I need to determine the window layout, figure out if they would side it with Hardie siding trim it with Hardie Trim, and use Hurricane rated windows etc... that best works for me, but this looks about right.
I am already in contact with my Homeowners Association working on what I have to do in order to get a waiver from the C&A to get this built, I have plenty of precedent however I am unsure if those builds were off the books and I am stirring up a hornets nest for about a dozen of my neighbors or not...

I know several things that MUST change if I go with this...

#1. The wide table kit for the BT3100 has to go. I need space enough to walk around it. I need to remove about a foot of table saw to make this work.
#2. The current workbench would need to lose 12" of overall length, same thing as the saw.
#3. The current, cheap, but very, very functional Chicago Electric 12" sliding miter saw has got to go. It takes up too much space. I am not sure if I am going to want to go with a slider with forward facing rails like a Hitachi, or even a *gasp* Festool Kapex. Now long time readers of my online writings know, that unless I win one in a tool giveaway, a Kapex isn't going to happen. For one thing I have WAY better things to do with my money than buy a Festool. Sure they are nice but dang they are spendy! Chances are better than good I will likely go with a Hitachi C12RSH, keeping my Diablo blade thank you very much!

Other space utilization considerations need to be taken into account.

#1. The walls, since this isn't "living space" or attached to it, can be covered in plywood / OSB or similar material, No more worrying about where a stud is to mount something to a wall
#2. The loft ceiling voids will be empty. Chances are I will make my clamp storage happen there and recycle the materials used for my current rolling clamp cart.
#3. My need for the over the base drill press storage cabinet will be MUCH more pressing.
#4. An honest review of what I need to do to design and build a full on proper table saw workstation, taking the sliding miter table, routing, work holding, and storage functions into consideration, along with providing proper ducting for dust collection.
#5. To free up floor space, 29 gallon air compressor, and dust collector / separator need to be housed in the loft, along with materials storage.

Sheet goods are going to remain a problem, and will likely be housed in the garage and broken down before they come to the shop.

This move, IF it actually comes to light, will allow me the following advantages.

#1. Dedicated shop space, no need to worry about LOML putting her potting stuff on my jointer ever again.
#2. It's large enough to get all my tools (mostly) in and work the projects I want to work, while being small enough to fit on my lot easily, and be affordable to insulate with expanding foam insulation which provides superior insulation properties.
#3. Allows me to separate my automotive tools from the woodworking tools, and allows me to bring the car into the garage to work on it.
#4. Discourages the casual "whatcha doin?" drop in visits that stop work in progress all too often...
#5. Huge increase in available storage space, not in the shop itself, but overall...
#6. Ability to have vehicle in the garage without having to move everything.

There are several distinct deal killers that I need to overcome and they are...

#1. Written variance from the HOA.
#2. Permits from the city. The spot in the lot that I want to put this in will also require.
#3. Moving existing POTS line from a diagonal run across the back yard, to a straight through easement through the yard. I would happily pay to have it moved, but that leads to the next problems...
#4. Finances to pay to make a big shed appropriate for a shop, insulattion, HVAC, electrical etc...

I am not sure which way this will go, but with any luck, and some fenagling, I might just end up in a 12x16x13 gambreal roof shed with loft storage!

19 May, 2014

More safety updates. Securing the Fire Extinguisher to the shop door... And how to ruin a perfectly bad blade...

First things first, I owe y'all a picture of this (can you tell I've lived in Texas a long time now?). I was in a hurry to get this done, and forgot to snap a couple of pics for your enjoyment...

I had initially intended to create a cradle of sorts to hold the extinguisher, and Velcro it in place. But honestly, I messed it up, and then came up with an idea...

Why not just attach the velcro, directly to the door? 

Okay maybe not "Velcro" (tm) brand hook and loop strip, because I couldn't find that particular brand in the color I wanted, but rather some generic $.97 at Walmart 18" long strip of bright red hook and loop strip. I simply sized it up, cut it to length, doubled up the ends the screws go in, and just screwed through it to the door on either side of the extinguisher. 

Once the strapping is run around and tightly attached, all the noisy, paint transferring slopping around and banging the extinguisher used to do is gone...

I know, a stupid "project" but it is actually a very nice addition that I should have thought of initially. The bright "Safety" red color really stands out, and looks top notch...


Now I may have mentioned this previously, but I am doing siding work on my house, removing 30 year old Masonite siding and replacing it with Hardie Panel, and Hardie Trim.

Now due to HOA restrictions, and product availability, I have to go "off label" as it were, and rip my Hardie Trim to 1.5" to mimic my original rough milled Cedar 1x2 trim. I probably could have gone back with Cedar again, but wanted to do Hardie. I did that on the garage, and loved it...

Problem is, the Hardie blade on my circular saw. I started out with an Irwin Marathon fiber cement blade, and in total bluntness, well it is blunt... And it tended to wander, a LOT... I am not sure if it is the saw that needs to be retired, or the Hardie blade, but one of these things has GOT to go. I have since swapped in a Freud Diablo PCD Hardie Blade. 

FWIW, the circ saw is a made in USA Skil 5150 with an edge guide / fence.

I did manage to get my sheet of Hardie Panel cut nicely though, so it may be operator error. I need to triple check my setup / method and verify I am not off my rocker here. For all I know I have the fence on the wrong side... 

16 May, 2014

Work sounds...

History is an interesting thing. Reaching back in time from current shop radios and MP3 players, back to the Ancient Romans with the drum beat cadence of their rowing ships, and most likely far before the Romans, human kind has long make work more pleasant, and efficient by mixing in music, or other background sounds into their wok environment to set a tone, a pace.

I realized this recently as I was working on some shop clean up after rearranging things for the recycling man, and I had left my phone in the house and simply didn't have anything but the sound of my own thoughts to set a tone for the work day. Things went very poorly productivity wise, and it just wasn't all that enjoyable...

This got me thinking about how I enjoy music, talk, and even movies when I am in the shop... And how much I manage to get done to the cadence of even the flow of good story telling.

For example, I have it well documented the progress I made once I got the help I desperately needed shoving the big drywall panels in place, how fast the rest of the work setting my shop back up went. This was all courtesy of my DNLA server and my Galaxy S4 phone. You see I own several Steven King novel based movies / TV miniseries on DVD that I have converted to mp4 on my DNLA server, and have been playing them in the shop.

Most notably the 2 series / movies I have been enjoying while I work have been the 1994 adaptation of Steven King's "The Stand". I guess it comes from being in that same age group as Molly Ringwald and Gary Sinise. The other one I have been enjoying is Langoliers.

My setup is pretty simple, and effective enough for what I am doing. Just my Samsung Galaxy S4 phone, using Bubble upnp as the DNLA client, and a "Music Bullet" external speaker. It gets plenty loud for listening while I work when hearing protection isn't needed. (Not listening when hearing protection is needed anyway, so no biggie...)

I do tend to listen to music the shop as well. For that I use my Pandora Radio app and tune in the Prog Rock station... Been known to listen to country in there as well...

So what keeps you moving in the shop, or out under the car, in the yard, or wherever you are doing your work?

15 May, 2014

Doing my part to be green means I needed to move things around in the shop... And fixing an old Made In The USA Skilsaw.

Let's set the record straight. The only reason I would ever hug a tree is to try to figure out the board feet contained in it. I do NOT worship at the altar of mother earth to say the least. And although I am well known for being an afficianado of the Volkswagen Type 2 microbus, I prefer mine without flower power, Birkenstocks, and Patchouli... I am NOT your typical environmental type.

However, as I have mentioned before I AM a Christian, and whole heartedly subscribe to the interpretation of scripture that says that God created the earth, and put man here to be stewards of this earth... So yes I am going to do my part, and encourage others to live and work cleanly.

In that effort, my community has been going, slowly, to an actualy reasonably effective curb side recycling program. We are actually on our second waste / recycling contractor for the city, and each has given us a recycling bin to put curb side...

The older contractor while they gave us a bin, really wouldn't allow us to recycle anything but maybe newspaper (don't subscribe) and maybe aluminum, and glass.

So for the longest time I was taking loads of recycling into work in my truck, and utilizing our facility recycling program to process out the empty cat food cans, plastic bottles and packages, cardboard boxes from all the Amazon and other online purchases etc...

That changed with the new trash / recycling contractor, that accepts nearly all recyclables that are not hazardous (still need to recycle electronics that are piling up, and have serious problems taking my stuff to Best Buy after they got busted simply dumping batteries left for recycling in the garbage dumpster, but that is another story all together...

So with this, and with the truck getting road / off road worthy, not to mention all the recent shop, and some household additions, I have had a LOT of packaging materials, cat food cans, pull off metal car parts etc... that needed to be recycled. And one recycling bin wasn't going to do it...

I needed to use the second tub, the one the old contractor left and never picked up...

Problem... I had put it to use holding my electric pressure washer, flat sprinkler hoses, and plastic drop cloths from my painting projects. These things needed to be moved...

So last night, with what little time I had in the shop I found a home in the lawn and garden shelves for the hoses, moved the pressure washer to the top of the library cabinet, and moved those drop cloths up into the attic just beside the ladder entry for easy access.

With the tub cleared up, I can now recycle all the old cardboard and stuff in one week instead of over several weeks overstuffing the one tub...

My old circular saw is an item I bought for myself back when I was in college. I was working at Ace Hardware in Houston Texas, and we had a customer return this thing as defective. They had run across the cord with the blade. It was processed and was heading to the dumpster, so I asked the owner of the store if I could try to salvage it, and he said take it... We had a replacement power cord in inventory, I paid employee price for it, something like $3.00 at the time, and installed it, then tested the saw. It worked perfectly! This saw has been working flawlessly now since that eventful day in, If I recall correctly 1995 or 1996.

I recently did something stupid, and dropped it, managing to bend the arched slide thing that the wing nut locks onto, and the motor body slides on to adjust the sole, the blade was out of square, the blade wandered terribly, and it was hard to adjust up / down with any accuracy.

Last night I pulled it apart as much as I needed to, and used my handscrew clamps to straighten that piece back out, after a few trial and error attempts, I have it where the saw adjusts smoothly, blade is square and parallel, and the blade wander is gone.

When I was working on it, I noticed something that I felt should be posted. I have tried a couple of their Made in China tools and am FAR less than impressed, but even for a puny 11 amp motor, this old Made in USA Skilsaw has really been a workhorse... Sure I would love for it to be more powerful, but there is nothing I have tried to do with this little saw it hasn't done exceptionally well...


If I totally ruined this particular saw, I would have to go looking for another one just like it... Not super feature rich, but it has the features I need, with great durability, and an unbeatable price tag to boot.

09 May, 2014

Rain delays for my projects... Yet another trip to Harbor Freight...

As we all know, or at least I hope we all know, water and wood aren't always the best of friends. Particularly untreated wood. It tends to deteriorate, warp, and do all sorts of not nice things when water is introduced into the equation.

As I mentioned in my previous post, I am needing to pick up a couple of sheets of 3/4" maple plywood for my lumber cart project. The price is reasonable, and the quality acceptable, however my plans for pick up last night went away when the first clouds opened up on me...

So change of schedule, although not quite change of plans... I need to postpone my materials pickup for a dry day, which doubtless will be here soon. Mind you I am not complaining about the rain, we need it, bad... I have huge cracks in my lawn even though I have been watering...

Now that the truck is running well, albeit with some body damage that needs to be fixed, I am on my way to fixing up the Saturn. Which means swapping pulleys off of the engine, power steering pump, and air conditioner... I need a pulley remover / installer tool. I have done a LOT of searching around for tools of this nature, including calling up friends to see if anyone has one. Nobody has one. Apparently most guys just do the loan a tool thing from Autozone, but I figure I will be back in this sort of work again, probably several times... After looking at the reviews on all the commonly available pulley remover / installer kits that would work in this situation, This is not the same as a pulley puller, similar in many ways, but this also presses the part ON. The best rated one, is oddly enough the Harbor Freight Pittsburgh Automotive Item #40749 Pulley Remover and Installer Set. Current price is $19.99 and slap the 25% off coupon on that, and you are out the door for $15.00 + tax.

I also have a coolant leak to diagnose. I am pretty sure the water pump is the only source of the leak, but I need to make sure. My old Stant pressure tester from back when I was a professional mechanic has long ago failed, repair parts for it are few and far between, and to top it off, I will need a series of adapters to get it to fit either the truck, or the Saturn let alone anything else. More research, and again, well with the exception of the tool truck models, the Harbor Freight Pittsburgh Automotive Item #69258 Radiator Pressure Tester Kit fits the bill at an affordable price.

And of course, while I am there, I will pick up the casters I need for the sheet goods rack. I am figuring on opting for a different caster than I had blogged about previously. Paranoia is getting to me, and I want more load handling capacity than the 3" rubber wheel casters provide, so instead I will be opting for the Haul Master Item #69538 3 inch Clear Polyurethane Swivel Caster With Brake. This gives me a total load handling capacity of 800 lbs, way above where I figure I will be, which will give me a comfortable safety margin. And while this is a dumb thing to consider. I actually kind of like the look of the clear casters.

While I am there I figure there are some other minor things that I need. My existing socket rails don't have enough clip things to hold all my sockets even though there is lots of rail left, so I was figuring on buying a couple of 3/8" and 1/2" socket rails that I could raid the clips off of.

My experience with the Pittsburgh wobble impact extensions was very positive, as was the experience with the 12" quick release extension, and I need impact rated regular extensions, so I will grab a set of them as well...

And of course I have a pocket full of freebie coupons, so I will pick up probably a couple more flashlights and tape measures... I have a plan for them...

So all in all it should be a good trip to Harbor Freight...

Of course given the weather playing nice on my way home, Home Depot is right on the way.... So the plywood, wood screws and lag bolts may just be coming home with me...

I have been thinking it if comes down to needing to overhaul the engine itself, I might try to source up a rebuildable long block from a 96-99 SC/SW/SL2 series. The lower end was much stronger, and valve train more efficient, but no real bolt on differences or programming differences, and just do a full on rebuild. I will need to ask around to some friends about auto shop space and specialty tools, specifically a cherry picker, and an engine stand.  I have a friend in Santa Fe Texas that recently rebuilt the Diesel engine out of his Jeep Liberty TDI that has the equipment, and I bet with the right proportion of beer & pizza might just be willing to assist with this project. And another mutual friend that is more or less a big Saturn guy, including what mods to do for maximum reliability and economy...

While I am digging around sourcing that long block, I also need to source up a seat recliner mechanism for the drivers side. The original literally failed the day before I parked it. I never really liked the seating in the 2001 Saturn although I did really like the seats in my 96... so if an opportunity to snag a pair of front seats from a 96-99 come up and they are in good shape, maybe just needing reupholstry, I will snag them and get them recovered and go ahead and install them in this car. Failing that, I need to find good aftermarket reclining seats that won't break my back, or the bank...

Now there are those, some of which we are related to that will ask... Why keep fixing up / nursing along an old cheap car like the Saturn? The answer is actually a bit complex. But I will give it a whack. An old econo box parked in some of the funkier parts of Houston Metro like around the Medical Center, or the Rodeo, isn't going to attract the attention of the thieves quite as easily as say a newer Benz... Combine that with the fact that I have owned this car so long, I KNOW exactly what has been done to it, and what to expect from it. Unless I buy another car brand new, I won't have that history... And lastly, no car payments... Can't beat that!

07 May, 2014

Preparing for the sheet goods / cutoffs cart.

My current sheet goods / cutoffs storage simply is NOT working. The driving force here is a need for fixing / patching the nasty old Masonite siding on my house. You see I have several sheets of Masonite in my current sheet goods area, but it is at the far back, behind all the other stuff, Cutoffs likewise are just sort of piled high in the 30 gallon galvanized trash can. It's just not working.

Now that the Wildersport / Lumber wagon is usable again, it is time to make a shopping list and head over the the BORG (For those not in the know BORG means Big Orange Retail Giant, or Big Ol Retail Giant, can be used interchangeably for the large chain home improvement centers such as Home Depot, Lowes, Sutherlands, etc...

Supplies needed are...

2 @ 3/4" Plywood. After looking at my local Home Depot, and Lowes, Home Depot has the better quality / cost point for this project. Cabinet grade maple ply is just  a few dollars more than basic sanded pine, so I might as well go with the maple.

2 @ 3" rubber wheel rigid casters 125lb each capacity.

2 @ 3" rubber wheel swivel casters plate with lock. 125lb each capacity.

16 @ 1/4 x 1-1/2" lag bolts to mount the casters.

Approximately 50 #8 x 2" square drive flat head screws.

2 @ 8 pack brass 1/4" L shape shelf support pins.

2 Sheets 3/4" cabinet grade maple ply @ $39.88 each. Subtotal $79.76

2 @ 3" rubber wheel rigid casters @ $3.99 each. Subtotal $7.98

2 @ 3" rubber wheel swivel plate casters with lock. @ $3.69 each. Subtotal $7.38

16 @ 1/4 x 1-1/2" lag bolts. $.15 each Subtotal $2.40

1lb box, approx 180 #8 x 2" square drive flat head screws. $4.18. Subtotal $4.18

2 @ 8 pack brass 1/4" L shape shelf support pins. $1.77 each Subtotal $3.54

I will also need 16 1/4" flat washers which I have in inventory.

Total pre tax for materials not in inventory to complete this project $105.24

While I did opt for Harbor Freight casters for this project, as there was no major difference in rating or quality between them and the casters from Home Depot / Lowes, however there are areas of this project I could further cut costs. Instead of the maple ply, I could be using 23/32" sheathing grade pine plywood at $23.95 / sheet, and I could use phillips head #8 x 2" screws already in inventory. However I am wanting to migrate to square drives, and I figure I could just spend the extra to have better quality wood to work with, giving me a higher quality end product.

I have the Diablo blade already set up on the circular saw, and I know exactly where the sacrificial board and straight edge guide are...

Weather and work schedule permitting, either Friday or Saturday, I will pick up the materials needed, and bring them back into my shop, and start measuring / marking my cut lines.

Unlike the original "Jerry" design for the lumber cart, I am using adjustable shelf pins and shelves on the pidgeon holes for smaller cutoffs. I am doing this to allow me finer adjustability for possibly adding more shelves, or leaving some out as needed.

IF I can talk my wife into helping me out by doing camera duty, I may do a build video of this project for you. Hopefully you will find it useful, and helpful.

06 May, 2014

Prepping for more upcoming auto related work. This time the Saturn. And making the wheels on the truck match.

Our 2001 Saturn SL2 is a bit long in the tooth. I bought it back when I was single, actually it was more of a gift from a former roomate that hated the car, it was a salvage titled car, and while the repairs were effective, some of the repairs were bandaids at best. That was back at about 35K miles.

I am now at 125K and the car is complaining. The body work on the front end needs some attention. Panels were never lined up by the original repair all that well, paint was poorly done, clearcoat was a joke, and now there are mechanical issues.

I have a squeal / growl in the serpentine belt that appears to be related to 2 components, the Air Conditioning Compressor clutch, and the power steering pump. The alternator was replaced about a year ago with an AC Delco remanufactured unit from www.rockauto.com and have had great service from it so far. And I appear to have a slight, but likely to get much worse coolant leak from the water pump.

So now, we replace the spinning mass to make sure and keep the car going well, I am going to be replacing pretty much everything that spins on the front of the engine, water pump, AC compressor clutch, power steering pump, tensioner, and idler pulleys.

Unlike older models, the pulleys aren't just keyed on and bolted on, they are press fit onto the shaft of their items. So a trip to Harbor Freight tools is in the cards for me. Specifically to pick up item #40749 Pulley Remover and Installer Set. I know I could pick one up as a Loan A Tool from Autozone, but I am likely to do this same job again probably within the next year or two to the truck.

I also need to do some wheel polishing to the truck. Since I replaced the front wheels due to the damage caused by the fine individual that tried stealing my wheels, the dim nature of the rears is ticking me off. I have however found a product that actually seems to be working, mostly, at getting the old rims polished up and gleaming in the sun like new.

I have used Mothers Mag and Aluminum polish in paste form for literally decades, and it is a good product, but it is labor intensive. I tried at the recommendation of the 4wheelparts guy MOTHERS 05112 California Gold Metal Polish Liquid - 12 oz.

I am more than impressed with this product. Yes there is still elbow grease involved, but FAR less than I had to deal with in the past with the paste product.and the results so far are fantastic. I have done the outer rim part of the passengers side rear and found it to be gleaming and spot free like new!

I will have to remove the rim to get the areas in the recesses and around the lug nuts, so I will go ahead and shoot video of the process, and SHOW you the results not just TELL you about it... I had serious doubts about this stuff, but using it has convinced me that I finally found a metal cleaning / polishing product that is far more than just marketing hype.

05 May, 2014

R.I.P. Kym Hindt, and prayers for Pastor Ron and his family...

At 7:00 A.M. Sunday April 4 2014, Kym Hindt, wife of our Pastor Ron Hind, and overall good egg, went to be with the Lord. At this time I am dedicating this space to offering our most heartfelt condolences to Pastor Ron, the Hindt family, the Calvary Chapel church family, and all those that have had the honor of calling Kym and Ron friend. 


For those of you, chances are most of you, that don't know about Calvary Chapel, or the ministry of Kym Hindt you can see a quick bio about her at...


01 May, 2014

Trans work done. Testing out the additions just added with the trans down...

I had several components on order just prior to the transmission on the truck going bad, one of them was the Coil Sumo Springs, and the other was the AirRAID Modular Intake Tube (MIT).

Both so far are performing exactly as expected. The Coil Sumo Springs don't completely correct the sag, but they do get the tires out of the fenders, so I am happy enough for now. However I AM planning on trying  a set of Moog 81120 Heavy Duty coil springs to correct the issue. Those are payload package springs and have a higher spring rate compared to the ones my truck shipped with. And certainly MUCH higher than the Rancho coils. I can't say enough at how disappointed I am that a company like Rancho that built their name on top quality off road / lift components and springs made the engineering choices they did when setting up the Quicklift Loaded with the springs they picked.... They really ought to sell them cheaper without the coils! They used to but dropped that product. I guess folks whined about having to change the coils in a strut...

The AirRAID MIT that is installed in my truck is first and foremost, a GREAT way to clean up the airflow under the hood. And even though I am NOT in California, for those that live there, yes the MIT is C.A.R.B. certified.
I really should take a fresher pic after cleaning up
the engine compartment! But there's the CARB sticker.

Installation was pretty straight forward, however the outer edges of the lip that inserts into the OEM airbox were a bit large, I had to relieve the edge with a hand file to get the thing to slip together. Just a minor casting issue. 

I wish I had cleaned / used spray detailer on the engine before snapping this pic, because with the plastics clean and black again as they are supposed to, the AirRAID just looks like it belongs there. If it weren't for the AirRAID plaque on the top of the tube it would look almost like it could possibly be factory.


Performance is improved, particularly throttle response. It was a little laggy with the OEM air tube / baffle setup, this really woke it up off the line, however I wouldn't say it made the truck fast. It's a full size 4x4 pickup with a winch and 35" rubber, not a dragster... I have yet to get through a full tank after the truck work has been done, but I am noticing the needle dropping slower. Maybe, just maybe I am getting better mileage. Who knows?

Fixing damage caused by an attempted wheel theft... Updates on the compressed air system, and lifting equipment.

It would appear that somebody wanted my wheels while I was at work yesterday.

Even with the Pro Comp wheel locks in place, they managed to get the lug nuts loose enough, that they worked their way off, within a block of my parking space, and bad things followed...

Of those bad things that followed, I suffered damage to 2 of the wheel studs, one was bent so badly the lug nut wouldn't go back on, and another was sheared clean off. So off to Autozone I went to get a couple of replacement studs, an open top lug nut (to allow me to press the stud on), and back to the house to fix this mess...


I managed to get things put back together securely, and security is following up on some leads so we will see where this goes, but it DID give me an opportunity to actually put to real use the new Pittsburgh Automotive 4 ton floor jack, and 6 ton jack stands.


The lousy reason to need this now not withstanding, I must say I am more impressed than I expected to be. I spent my first career working as a professional mechanic, and have remained around auto repair as a hobby since then. To say I am familiar with jacks / stands etc... is a n understatement. I have used everything from the pitiful scissors jacks that vehicle manufacturers include, to the giant industrial jacks for heavy trucks. And at least from the initial use, I can honestly say this Pittsburgh jack lifts my F150 with ease. Securing the lift on the Pittsburgh jack stands as well are solid and secure. Every bit as good as the much more expensive "Tool Truck" models I have used in the past. The jack operates super smoothly, lifts quickly, and contrary to what I have read in some other reviews, in my experience thus far, lowers predictably. It doesn't take too much of a twist of the handle to get it to start lowering, I guess if you overturn it, sure it will drop fast. That is operator error, not a problem with the jack! I haven't yet greased the zerk yet but will do so here probably this weekend to make sure I get the maximum life from this jack. The jack stands, are beefy. If you are familiar with the 2004 - 2008 F150, you know how large that is, take a peek at the stand under it compared to say the control arm and you will know just how massive these things are. They are good and heavy, the "teeth" and cam of the adjustment parts are well formed, and everything is as it should be. The ONLY thing I find lacking in the jack stands is also commonly lacking on most others, and that is there is no rubberized grip / handle on the lever for the cam. I think it was a pair of older Craftsman jack stands I had used a friend owned that had that feature and I REALLY like it. I may plastidip mine to get that rubber coating...

As I was reassembling the studs to the hub flange, I started off by using my Harbor Freight "Earthquake" 1/2" impact wrench. It was working great, I was honestly getting concerned for the socket I was using and the just gobs of abuse the hammering action of the impact was producing, so instead I opted for the high torque / low impact method (putting the socket on a 32" breaker bar, and leaning all of my substantial weight into it. It went in with every bit of force my far too much weight can muster. I won't go into the weight issue, but the fact is that the impact itself couldn't muster the amount of torque that I can generate with a long bar. Gotta love mechanical advantage. That being said, the impact did perform EXACTLY as it is supposed to. I am now completely confident in my compressed air systems performance.

Typical of the Earthquake guns, my nameplate
label fell off and is now in the weeds somewhere 
at my Brother in laws shop.

I do however have some concerns with the air hose that came loaded on the hose reel. I am getting some "material transfer" from the hose itself to my hands when I handle the hose. I mentioned when I originally got the thing that I suspect I am going to need to swap in a better quality hose eventually. I am sad that Harbor Freight no longer carries Goodyear air hoses. However Northern Tool has stacks of them, so I guess I will get one there when this one goes bad.

The swap job took me a bit longer than I expected, but that was because of me trying to run the first stud in with the impact, I got it in at a bad angle and blew the splines on the stud itself, had to go back out and source another one... (yeah, I knew better, I just didn't DO better...).

There is (not pictured) some damage to the back side of the rim that has me concerned about being able to properly balance it. Thankfully Pro Comp is selling the 1089 17x9 in 6 on 135 again... I have 2 on order, will replace both fronts, and have the right front rim rotated to hold the spare tire.  So I guess that even though I did get handed a lemon as it were, at least I am trying to make lemonade out of it.